Purpose
I wanted to integrate Cursor AI with Figma files to directly convert design resources into code. In most other design and art disciplines, the work is considered “complete” only when the final product is finished — so why should implementation in UX/UI design be solely the developer’s responsibility? This was a challenge to that question. Ultimately, I think what I really wanted was to build a website driven by a sense of authorship.
Doubts About Feasibility
-
Even if the appearance can be replicated, can things like flex, grid layout, margin/padding, and textures be faithfully transferred exactly as I designed them?
-
Wouldn’t the development effort double? With lovable and v0, it felt like they just threw code at you, so I never wanted to use them in actual production. Design ultimately plays an irreplaceable role in providing emotional refinement to a product, yet those tools only focused on trends and simplicity without being truly user-friendly.
-
Can prototypes with animations also be implemented?
- In Figma, prototypes and animations are built through frame-to-frame connections, but wouldn’t it be difficult when connecting via MCP on a single-frame basis?
- If animation is possible, which library would be most effective?
-
How are states like hover implemented?
-
How can components that require JavaScript be handled? Wouldn’t it just render the screen while ignoring the functionality?
Why I’m Writing This Blog Post
Most people just show the final result after completing the Cursor integration. I wanted to make it so that even someone without a development background could use Figma + Cursor MCP. Of course, it was a meaningful process of trial and error, but I hope others can develop quickly without going through the same struggles I did. Since this is a skill needed to reduce communication overhead between designers and developers and to build faster, more satisfying products together, I hope many people will find this useful.
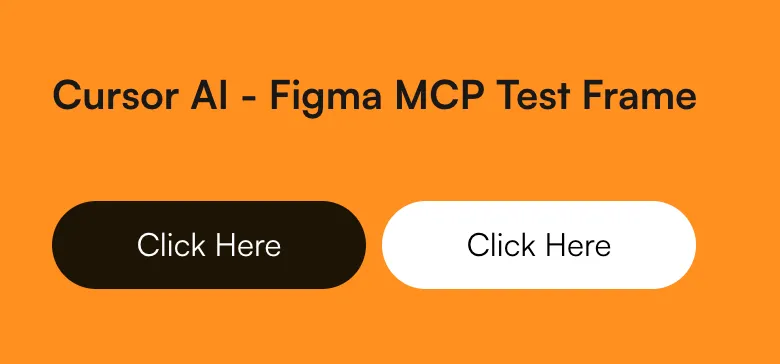
So, What Was the Result?
It produced a fairly well-structured and clean result. This landing page was an opportunity where I could handle nearly the entire process up to just before deployment.
Unfortunately, I did have to customize the carousel and motion effects (though I did get a bit of help from AI for that too), but Cursor was a huge help with the initial structure and design system.
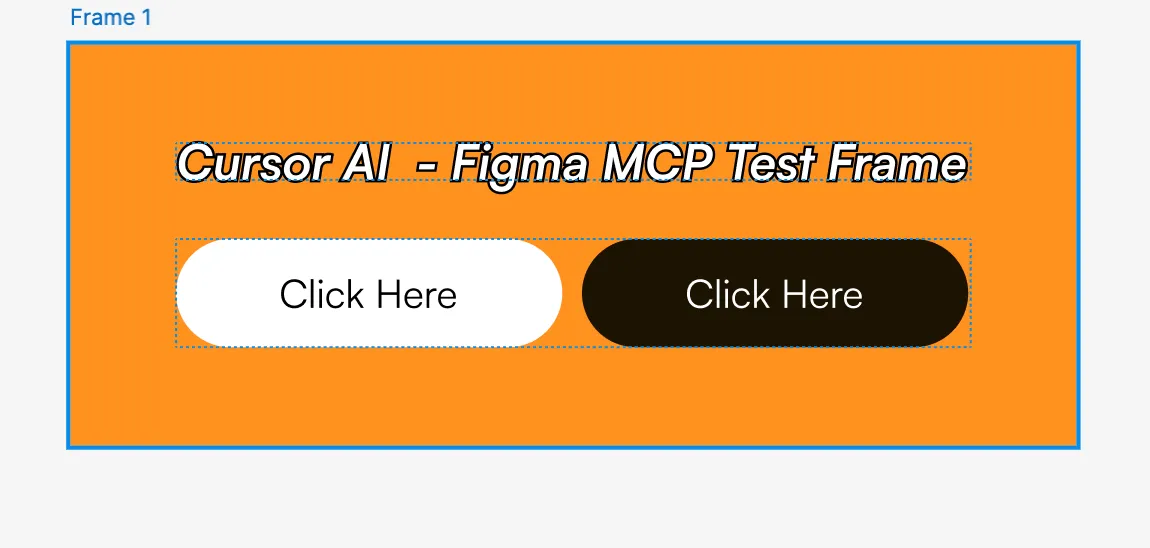
If you follow the steps below, you too can build a landing page like the one shown here! (Probably.) Here's a glimpse of the parts I can show without revealing the site name.
Steps
1. Open the Frame you want to connect in your Figma file
2. Log in to Cursor
- 2-week free trial per account
- US students can use the Pro plan for free
- I went through 3 accounts, got IP-banned, and ended up paying for 1 year of Pro

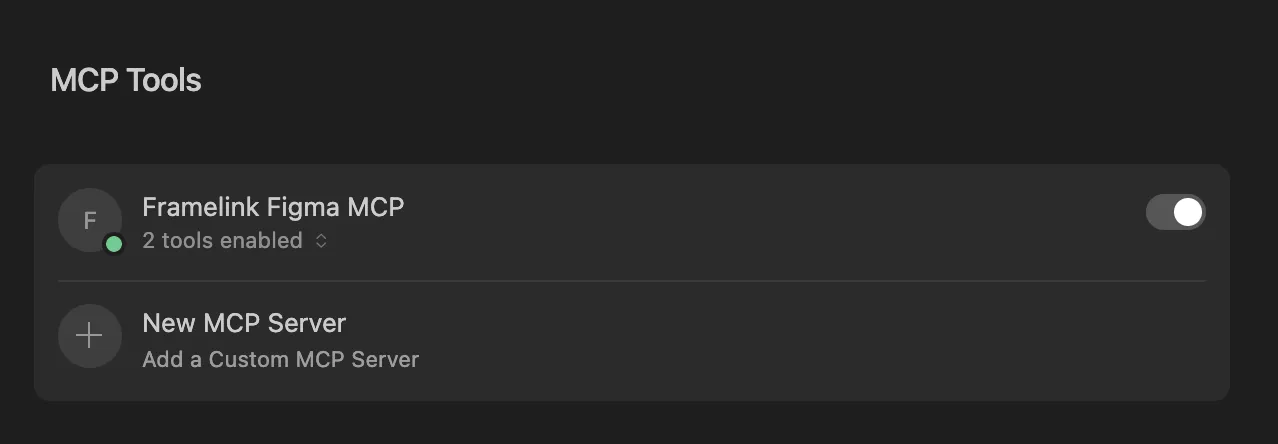
3. Go to Cursor Settings > MCP Tools > Click New MCP Server
Paste the following into the generated mcp.json file:
{
  "mcpServers": {
    "Framelink Figma MCP": {
      "command": "npx",
      "args": [
        "-y",
        "figma-developer-mcp",
        "--figma-api-key=YOUR-KEY",
        "--stdio"
      ]
    }
  }
}
4. You need to fill in the --figma-api-key=YOUR-KEY part
-
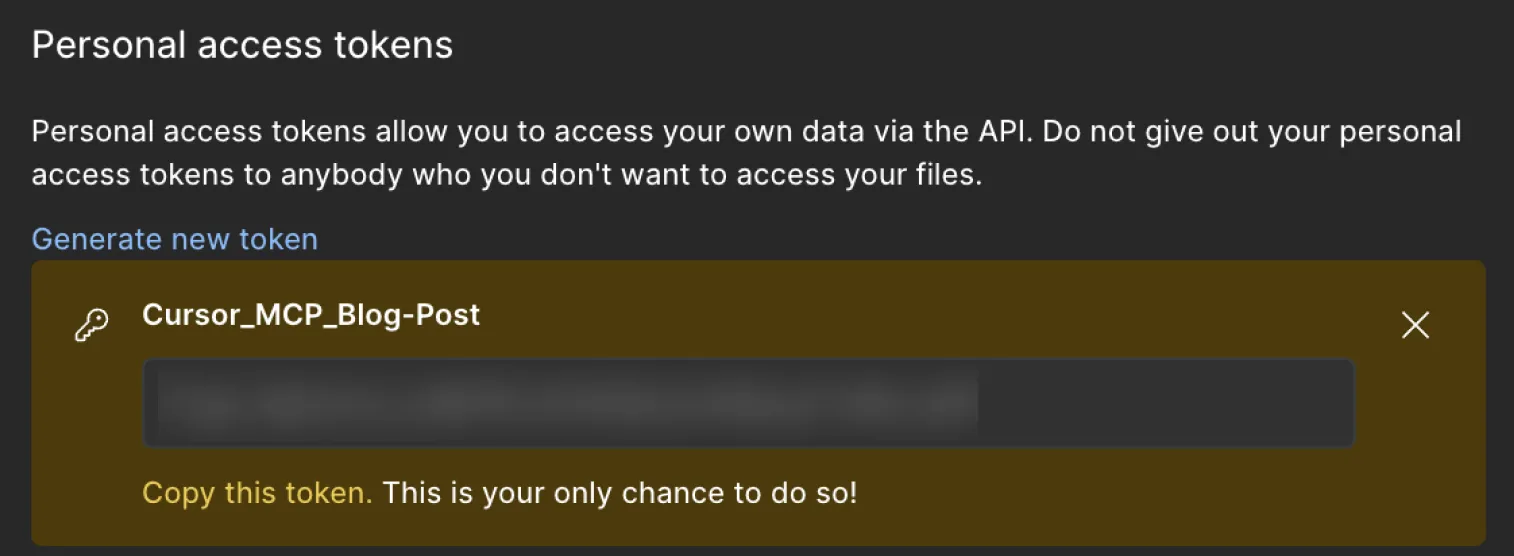
Go to Figma > Settings > Security and click ‘Generate new token’
-
Enter a name you can identify it by, select the Scopes, and generate it

-
Click Copy this token and paste it into
YOUR-KEY -
Be careful not to include it when asking questions to AI chatbots like GPT
5. Once the setup is complete, you should see the following screen
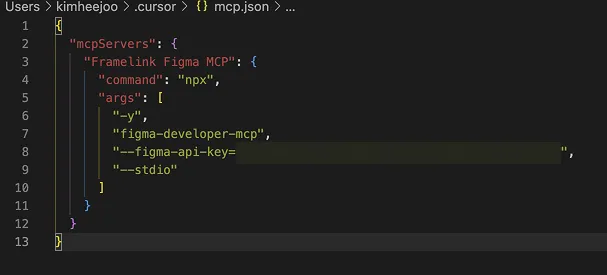
4. By now you should have pasted everything into mcp.json — close it and go back to Cursor Settings. The JSON you just created should appear like this.
Turn on the MCP server toggle if it’s off
Requesting Implementation via Cursor Chat
In this basics guide, we’ll skip advanced prompting and settings and just focus on getting things built. Open Cursor Chat and type the following:
implement this figma file and generate a new react project by (html/css/javascript or react or next app) on desktop @(링크)
Additional prompt:
I need new project and want you to adapt get_figma_data
Always choose the best consideration for this project
-
If the connection is successful, you’ll see a screen like this:

-
After reviewing the generated code, click the Accept button in the bottom right

Running Locally
I generated a next app, then ran the local server:
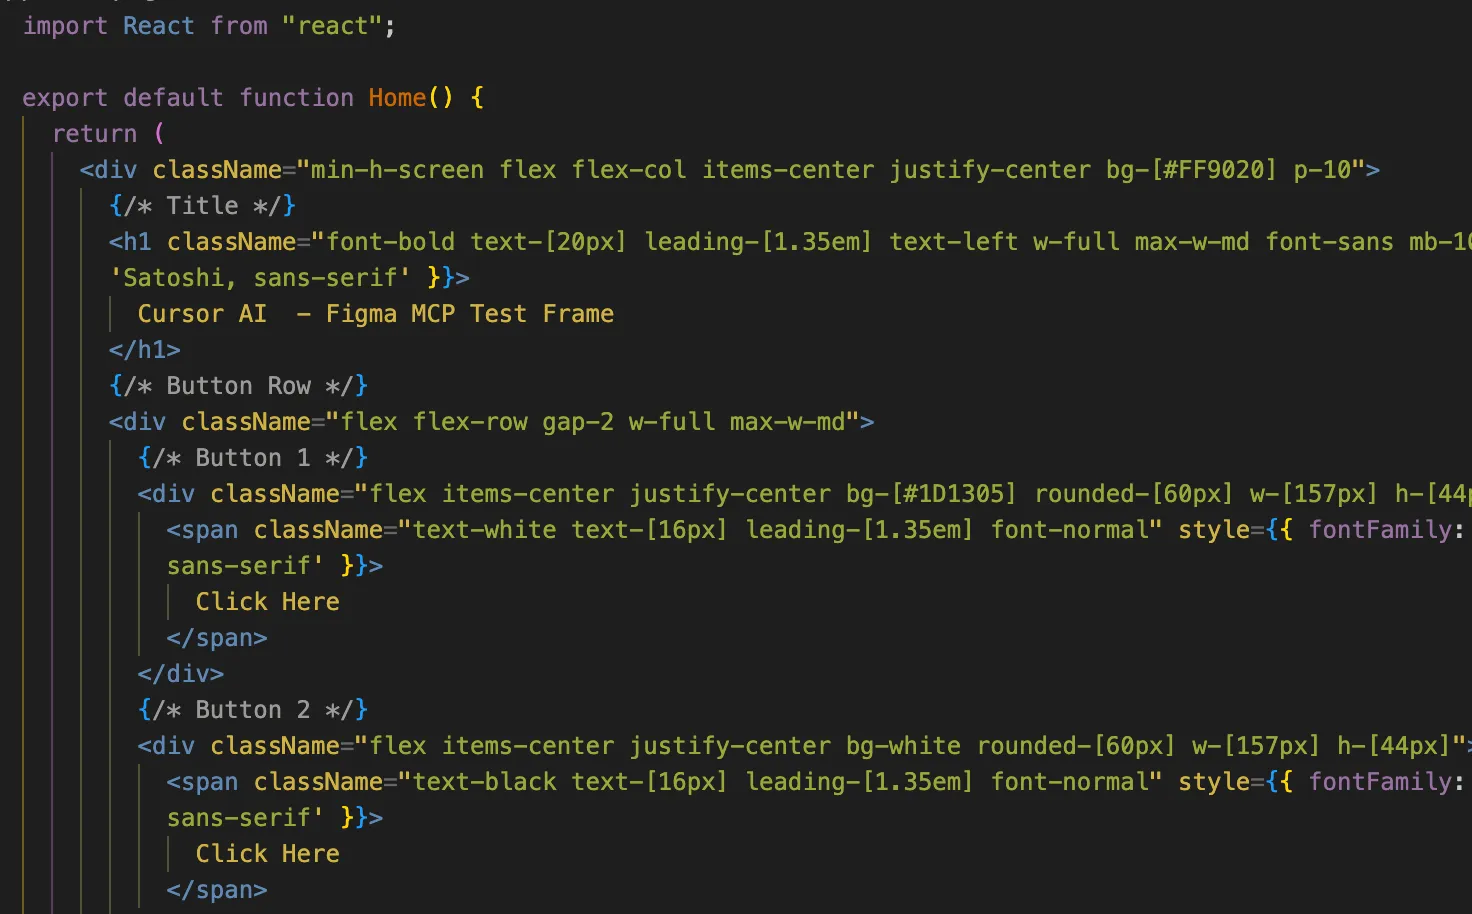
It was a simple component page, but Figma’s auto-layout settings were well reflected in the div structure.